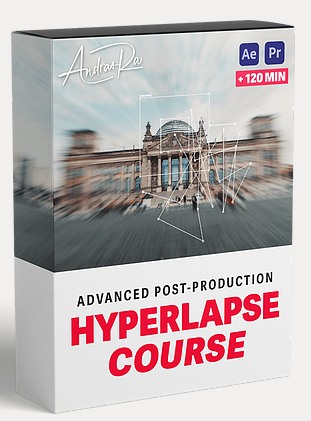
Andras Ra – Advanced Post-Production: Hyperlapse Course
$199 Original price was: $199.$40Current price is: $40.
Shopping Instructions:
- DISCOUNT 15% : SHOP15
- Product Delivery: Within 1 – 12 hours after purchase.
This course has it’s focus on my entire post-production workflow. You will learn step by step from complete scratch from Importing, to stabilizing a Hyperlapse completely without the warp stabilizer, and finally animating. File Size: 4.875 GB
Andras Ra – Advanced Post-Production: Hyperlapse Course
LEARN TO SHOOT AND EDIT
CINEMATIC HYPERLAPSES
This simple 5-step workflow is for any content creator who wants to produce smooth & stabilized Hyperlapses that stand out & raise your production value without wasting weeks trying to figure it out all on your own.
WHAT’S INSIDE THE
ULTIMATE HYPERLAPSE COURSE?
In this program, you will learn the essential secrets to creating your own stunning one-of-a-kind Hyperlapses.
I dive deep into advanced editing techniques and show you my specific workflow I use to create high-quality Hyperlapses as efficiently as possible.
This course has it’s focus on my entire post-production workflow. You will learn step by step from complete scratch from Importing, to stabilizing a Hyperlapse completely without the warp stabilizer, and finally animating.
I will also guide you through difficult editing problems and am always available to answer any of your questions via email.
Plus, I give you a lot of tips and tricks to make your Hyperlapse stand out! By the end of this course, you will take your videos to the next level and raise the production value of your work.
Get immediately download Andras Ra – Advanced Post-Production: Hyperlapse Course
Introduction (1:43)
Shooting, Settings, Equipment (08:59)
Module 02 – Photo Hyperlapse (After Effects)
File Organization in After Effects (04:32)
Importing & Preparing the Photo Hyperlapse (07:01)
Tracking the Position & Rotation (10:34)
Fix Black Borders & Motion Blur (09:03)
BONUS: Faster Way of Stabilizing (10:04)
Module 03- Video Hyperlapse (After Effects)
Stabilizing a Video Hyperlapse (12:00)
Module 04 – Challenges & Problems (After Effects)
Challenge 1: Tilting Hyperlapse (03:40)
Challenge 2: Tracker is being blocked (18:03)
Challenge 3: Cleaning Up Dust & Dirt Spots from Sensor (07:27)
Challenge 4: Problems with Motion Blur (03:25)
Module 05 – Conclusion so far
Conclusion so far (1:15)
Setting up Premiere Pro (04:46)
Premiere Pro Editing & Animating Part 1 (09:17)
Module 06 – Editing and Animating (Premiere Pro)
Premiere Pro Editing & Animating Part 2 (08:14)
Premiere Pro Color & Export (04:11)
Module 07 – Final Words
Final Words (00:51)
SPICE UP YOUR HYPERLAPSES WITH ADVANCED EDITING TECHNIQUES
STABILISATION IN AFTER EFFECTS
File Structure, Importing, Stabilisation, Exporting – & more topics will be demonstrated in After Effects. You will learn how to stabilize a Photo Hyperlapse in just 5 Simple Steps or a Video hyperlapse in just 4 Simple Steps. These are the techniques I personally use in projects for high paying clients which are completely available to you so you can increase the production value of your videos.
What happens if something blocks your tracker? What to do with dust & dirt spots on your sensor? Does your Hyperlapse keep tilting? I will guide you through these & more common problems during your editing process.
ANIMATING IN PREMIERE PRO
Now that you have a super stable Hyperlapse, I will show you how to take it a step further with super simple animations in Premiere Pro (Methods also work in other Video Editing softwares).
Let your Hyperlapses stand out!
Get immediately download Andras Ra – Advanced Post-Production: Hyperlapse Course
LET ME INTRODUCE MYSELF
Andras Ra
Hi my name is Andras, I am a 25 years old professional Video Editor & Videographer.
I’ve been shooting Hyperlapses for almost 5 years now. In this time I have worked as a freelance editor for various big companies, influencers, and used my Hyperlapses for brands like DJI, Insta 360 and more.
Throughout the years I experimented a lot with different techniques but couldn’t find anything online. So it took me a while but I finally developed my own professional Hyperlapse workflow.
Be the first to review “Andras Ra – Advanced Post-Production: Hyperlapse Course” Cancel reply
Related products
Personal Development
Personal Development
Personal Development
Personal Development
Garrett J White – WARRIOR .THE BLACK BOOK . How To Master Art And Science Of Having It All
Personal Development
Personal Development
Personal Development


Reviews
There are no reviews yet.