Stone River eLearning – Build Android Apps with App Inventor 2 – No Coding Required
$199 Original price was: $199.$40Current price is: $40.
Shopping Instructions:
- DISCOUNT 15% : SHOP15
- Product Delivery: Within 1 – 12 hours after purchase.
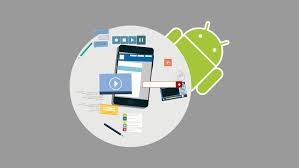
App Inventor 2, however, cuts through all of the smoke and allows anyone – even those with no coding experience – to build Android apps from the ground up. This course will teach you how.
Stone River eLearning – Build Android Apps with App Inventor 2 – No Coding Required
Everybody has a great idea for an app. The problem is, not many of those people have the skills or knowledge required to make that idea a reality. Building an app, regardless of its simplicity or platform, requires certain technical know-how like coding, UX/UI design, and more. App Inventor 2, however, cuts through all of the smoke and allows anyone – even those with no coding experience – to build Android apps from the ground up. This course will teach you how.
Build Apps Without Learning Code!
Gain a practical understanding of programming basics
Navigate and use App Inventor 2 efficiently and effectively
Create and build your own apps for Android
Test and update your apps after you’ve built them
Learn how to publish your app to Google’s Play Store
Android Apps in an Instant
This course will teach you everything you need to know about building apps – without the complicated coding normally required. If you have a good internet connection, a basic understanding of what an Android app is, and a great idea for an app that doesn’t yet exist, then you’re the perfect candidate! While the course is aimed at beginner programmers or those with no coding experience whatsoever, experienced app builders who want to learn from a new angle will benefit too.
During the 204 lectures and 17 hours of content contained within this course, you’ll learn the basics of programming in a fun and practical way, while creating fully fledged, ready-to-use Android apps. You’ll off with setting up App Inventor 2 and choosing the options you’ll need for your future apps. Then you’ll get to know the interface and tools before diving straight in and creating not one, not two, but TEN apps. These apps will increase in complexity as you work through them, using features such as the component editor and blocks editor.
When you’ve built your ten apps you’ll also learn how to test, update, and publish them to the Play Store. By the end of this course, you’ll be an advanced app builder using App Inventor 2.
Tools Used
App Inventor 2 is an open source web application originally developed by Google and now maintained by MIT. It is aimed at beginner programmers and specially designed to enable them to build Android apps. It turns complicated coding language into visual drag and drop blocks, so there is no need for the user to learn code before building their apps.
Get immediately download Stone River eLearning – Build Android Apps with App Inventor 2 – No Coding Required
Course Curriculum
1.Introduction
Introduction (2:34)
Course Breakdown (4:40)
Introduction to App Inventor 2 (2:16)
2.Setting Up App Inventor For Development
App Inventor Setup Introduction (0:31)
Creating A Gmail Account (4:17)
App Inventor Companion App – Option 1 (6:56)
Setting Up Onscreen Emulator – Option 2 (5:19)
Setting Up Usb Device Part 1 – Option 3 (6:20)
Setting Up Usb Device Part 2 – Option 3 (6:30)
Section Recap (0:17)
3.Breaking Down The Component Editor
Component Editor Introduction (0:34)
Pallette Section (2:03)
Components View And Components Section (2:05)
Properties Section (1:54)
Blocks Editor Build Options And Media Section (2:56)
Components Editor In Action (9:12)
Section recap (0:18)
4.Breaking Down The Blocks Editor
Blocks Editor Introduction (0:24)
Blocks Drawer (4:21)
Blocks Viewer And Media Section (3:20)
Blocks Editor In Action (6:28)
Section Recap (0:19)
5.Your First App: Hello Purr
First App Introduction (0:35)
First Application Overview (0:45)
Setting Up Our First Application (2:09)
Component Spotlight: Button (2:48)
Component Spotlight: Label (1:37)
Creating Our First Application (6:02)
Running Our Application (1:35)
Section Recap (0:34)
6.Your Second App: Audiobook Log
Second App Introduction (0:34)
Second App Overview (1:39)
Component Spotlight – Horizontal Arrangement (3:32)
Component Spotlight – Vertical Arrangement (4:03)
Arranging Our Buttons (6:21)
Component Spotlight – Checkbox (3:15)
Naming Our Chapters (2:57)
Component Spotlight – Sound (2:42)
Setting Up Chapter Audio (2:01)
Adding Space To Our Layout (6:23)
Updating Our Component Names (6:13)
Block Time: Making Our Buttons Play Audio (5:37)
Testing Final App (3:03)
Section Recap (0:27)
7.Understanding Backing Up, Restoring & Sharing App Inventor Projects
App Backup, Restore And Share Intro (0:16)
Understanding App Inventor File Types (5:10)
Downloading & Backing App Inventor Apps (5:31)
Uploading, Sharing & Restoring App Inventor Apps (5:06)
Section Recap (0:19)
8.Your Third App : Skeleton Review
Third App Introduction (0:35)
Third App Overview (1:09)
Component Spotlight: Canvas (5:19)
Layout Canvas & Labels (5:43)
Component Spotlight: Ball (5:02)
Implement Hotspots And Upload Media (6:17)
Block Time – Activating Tapped Bones (7:39)
Block Time – Simplifying Activated Bone Blocks With Procedures (11:04)
Block Time – Resetting Hotspot Colors With Procedures (8:28)
Component Spotlight – Player (2:08)
Adding Vibration To Hotspots (2:05)
Section Recap (0:28)
9.Your Fourth App: My Business App
Fourth App Introduction (0:53)
Fourth App Overview (2:31)
Basic Home Screen Layout (5:18)
Navigation Drawer Layout (5:54)
Component Spotlight – Activity er (3:53)
Implementing Website Activity (4:19)
Implementing Map Activity (4:38)
Component Spotlight – PhoneCall (2:21)
Implementing Call Screen Part 1 – Intro To Multiple Screens (6:03)
Implementing Call Screen Part 2 – Intro To Multiple Screens (8:20)
Component Spotlight – Textbox (3:28)
Implementing Email Screen Layout (7:05)
Block Time – Sending Emails With The Help Of Variables (9:50)
Section Recap (0:42)
10.Your Fifth App: Free Form Task List
Fifth App Introduction (0:41)
Fifth App Overview (3:22)
Implementing Top Task Bar Layout (8:17)
Component Spotlight – Listview (4:05)
Component Spotlight – File (2:12)
Finalizing Main Screen Layout With Listview, File, And Empty List Image (6:35)
Implementing Taskform Screen And Structure (5:34)
Component Spotlight – Listpicker (5:46)
Finalizing Taskform Screen With Listpicker, And Form Input (7:22)
Block Time: Passing Data Between Screens (5:10)
Block Time: Adding Tasks To File – Understanding Parsing Pt1 (7:29)
Block Time: Displaying Tasks From File Using Listview – Understanding Parsing Pt2 (8:26)
Block Time: Deleting Our List And Toggling Filter Bar (8:09)
Block Time: Toggling Main Image And Canceling Tasks (7:56)
Block Time : Showing New Tasks First With List Reversal (11:28)
Block Time: Making Tasks Pretty Using Text Manipulation (7:11)
Section Recap (0:33)
11.Your Sixth App: Auto Reply Text Messaging App
Sixth App Introduction (1:07)
Sixth App Overview (2:31)
Implementing Basic Layout Structure (7:10)
Component Spotlight – Texting (2:00)
Component Spotlight – Tinydb (5:01)
Component Spotlight – Spinner (4:36)
Component Spotlight – Timepicker (3:23)
Component Spotlight – TextToSpeech (2:00)
Implementing Lower Select Reply Message Structure (8:43)
Block Time – Showing And Hiding Add New Message Arrangement (4:39)
Block Time – Adding Messages To Spinner (5:49)
Block Time – Showing Messages In Spinner (9:03)
Block Time – Formatting Return Time For Message (10:30)
Block Time – Toggling Application State On And Off (4:30)
Block Time – Sending Auto Reply Messages And Text To Speech (4:37)
Section Recap (1:08)
12.Your Seventh App: Drawing App
Seventh App Introduction (1:30)
Seventh App Overview (3:25)
Component Spotlight – Camera (1:23)
Component Spotlight – ImagePicker (2:40)
Implementing Main Screen Layout (5:47)
Implementing Basic Layout For Drawing Screen (4:41)
Block Time – Linking To Drawing Screen (3:59)
Component Spotlight – Slider (3:46)
Implementing Color Picker Drawer Layout (5:17)
Block Time – Screen Initialization And Basic Canvas Drawing (6:28)
Block Time – Picking Paint Colors (7:54)
Component Spotlight – Sharing (2:42)
Implementing Options Drawer Layout (6:32)
Block Time – Adding And Subtracting Brush Sizes (6:40)
Block Time – Sharing Completed Images And Coloring Lower Gesture Bar (6:30)
Block Time – Clearing The Canvas (2:15)
Block Time – Toggling Drawer State With Gestures (11:24)
Section Recap (1:15)
13.Your Eighth App: Memory Viewer
Eighth App Introduction (1:11)
Eighth App Overview (2:30)
Component Spotlight – Camcorder (1:26)
Component Spotlight – Locationsensor (4:40)
Implementing Main Screen Layout (6:30)
Block Time – Custom Component Colors And Basic Buttons Setup (7:53)
Block Time – Storing Memory Data (7:40)
Implementing Memory List Screen Layout (1:57)
Block Time: Displaying Our List Of Memories (12:40)
Block Time – Selecting And Clearing Memorie (7:32)
Component Spotlight – Webviewer (3:37)
Implementing View Memory Screen Layout (5:45)
Block Time – Viewing And Formatting Memory Footage (8:59)
Block Time- Viewing Location Data (6:20)
Section Recap (0:42)
14.Your Ninth App: Alarm Clock
Ninth App Introduction (0:44)
Ninth App Overview (2:47)
Component Spotlight – Clock (7:03)
Implementing Basic Timer Layout (7:02)
Implementing Time, Buttons, And Slider Layout (9:23)
Block Time – Centering Our Clock (8:56)
Block Time – Setting And Initializing Our Clock (6:51)
Block Time – Programming Our Timer (4:10)
Block Time – ing And Pausing Timer (5:18)
Component Spotlight – Notifier (4:02)
Block Time: Sounding & Resetting Timer (8:29)
Block Time – Understanding Clock Rotation (8:59)
Block Time – Rotating Our Clock Hand (10:47)
Component Spotlight – Tinywebdb (6:50)
Favorites Bar Layout (5:28)
Block Time – Creating A New Favorite Part 1 (4:58)
Block Time – Creating A New Favorite Part 2 (6:59)
Block Time – Using A Favorite Part 1 (7:09)
Block Time – Using A Favorite Part 2 (9:33)
Section Recap (0:43)
15.Your Tenth App: Pong Art Game
Tenth App Introduction (0:51)
Tenth App Overview (3:34)
Component Spotlight – Accelerometer (6:19)
Implementing Game Menu Layout (6:23)
Block Time – Dynamic Button Sizes With Accelerometer Part 1 (7:46)
Block Time – Dynamic Button Sizes With Accelerometer Part 2 (13:48)
Block Time – Configuring Game Modes (3:41)
Implementing Basic Settings Screen (6:41)
Implementing Ball Color Group Part 1 (7:14)
Implementing Ball Color Group Part 2 (7:27)
Implementing Paddle Length Group (8:17)
Implementing Paddle Movement Group And Play Arrangement (7:09)
Block Time – Creating A Toggle Group (5:42)
Block Time – Finalizing Toggle Groups (5:25)
Block Time – Sliding Color Drawer Open And Closed (9:54)
Block Time – Fixing Color Drawer Open And Close Issues (4:35)
Block Time – Storing Game Settings (4:57)
Block Time – Setting And Saving Canvas Color (7:06)
Block Time – Tying Up Loose Ends (5:43)
Implementing Game Screen Layout (7:54)
Block Time – Initializing Game Settings Part 1 – Initializing Game Variables (7:13)
Block Time – Initializing Game Settings Part 2 – Initializing Color Modes (8:51)
Block Time – Initializing Game Settings Part 3 – Initializes Paddles (10:26)
Block Time – Configuring Paddle Movement Part 1 (11:33)
Block Time – Configuring Paddle Movement Part 2 (6:49)
Block Time – Configuring Collisions Part 1 – Colliding With Paddle (5:48)
Block Time – Configuring Collisions Part 2 – Colliding With Walls (8:45)
Block Time – Configuring Collisions Part 3 – Game Modes (9:44)
Block Time – Adding Bad Hit Flash (9:30)
Block Time – Adding Canvas Painting (8:23)
Block Time – Setting Up Game Over (7:47)
Section Recap (0:49)
16.Getting Your App To The Market
Application To Market Introduction (0:54)
Introduction To Android Market (google Play Store) (3:22)
Introduction To Google Play Developer Account (0:56)
Opening A Google Play Developer Account (2:49)
Google Play Developer Account Breakdown (6:22)
Application Graphic Assets (3:18)
Uploading And Publishing App To Google Play Store (11:17)
Updating Your Android Application (6:06)
Section Recap (0:23)
17.Conclusion
Course Recap (2:38)
Additional Resources (3:08)
Closing Message (2:32)
Get ed now!
Frequently Asked Questions
When does the course and finish?
The course s now and never ends! It is a completely self-paced online course – you decide when you and when you finish.
How long do I have access to the course?
How does lifetime access sound? After enrolling, you have unlimited access to this course for as long as you like – across any and all devices you own.
What if I am unhappy with the course?
We would never want you to be unhappy! If you are unsatisfied with your purchase, contact us in the first 30 days and we will give you a full refund.
Read more: https://archive.is/T87J1
Be the first to review “Stone River eLearning – Build Android Apps with App Inventor 2 – No Coding Required” Cancel reply
Related products
SEO & Design Website
SEO & Design Website
SEO & Design Website
SEO & Design Website
Intelligynce Platinum – Spy On Over 100.000 Shopify Stores And Over 500.000 Products
SEO & Design Website
SEO & Design Website
SEO & Design Website
SEO & Design Website










Reviews
There are no reviews yet.